Laser Cutter Project
Purpose
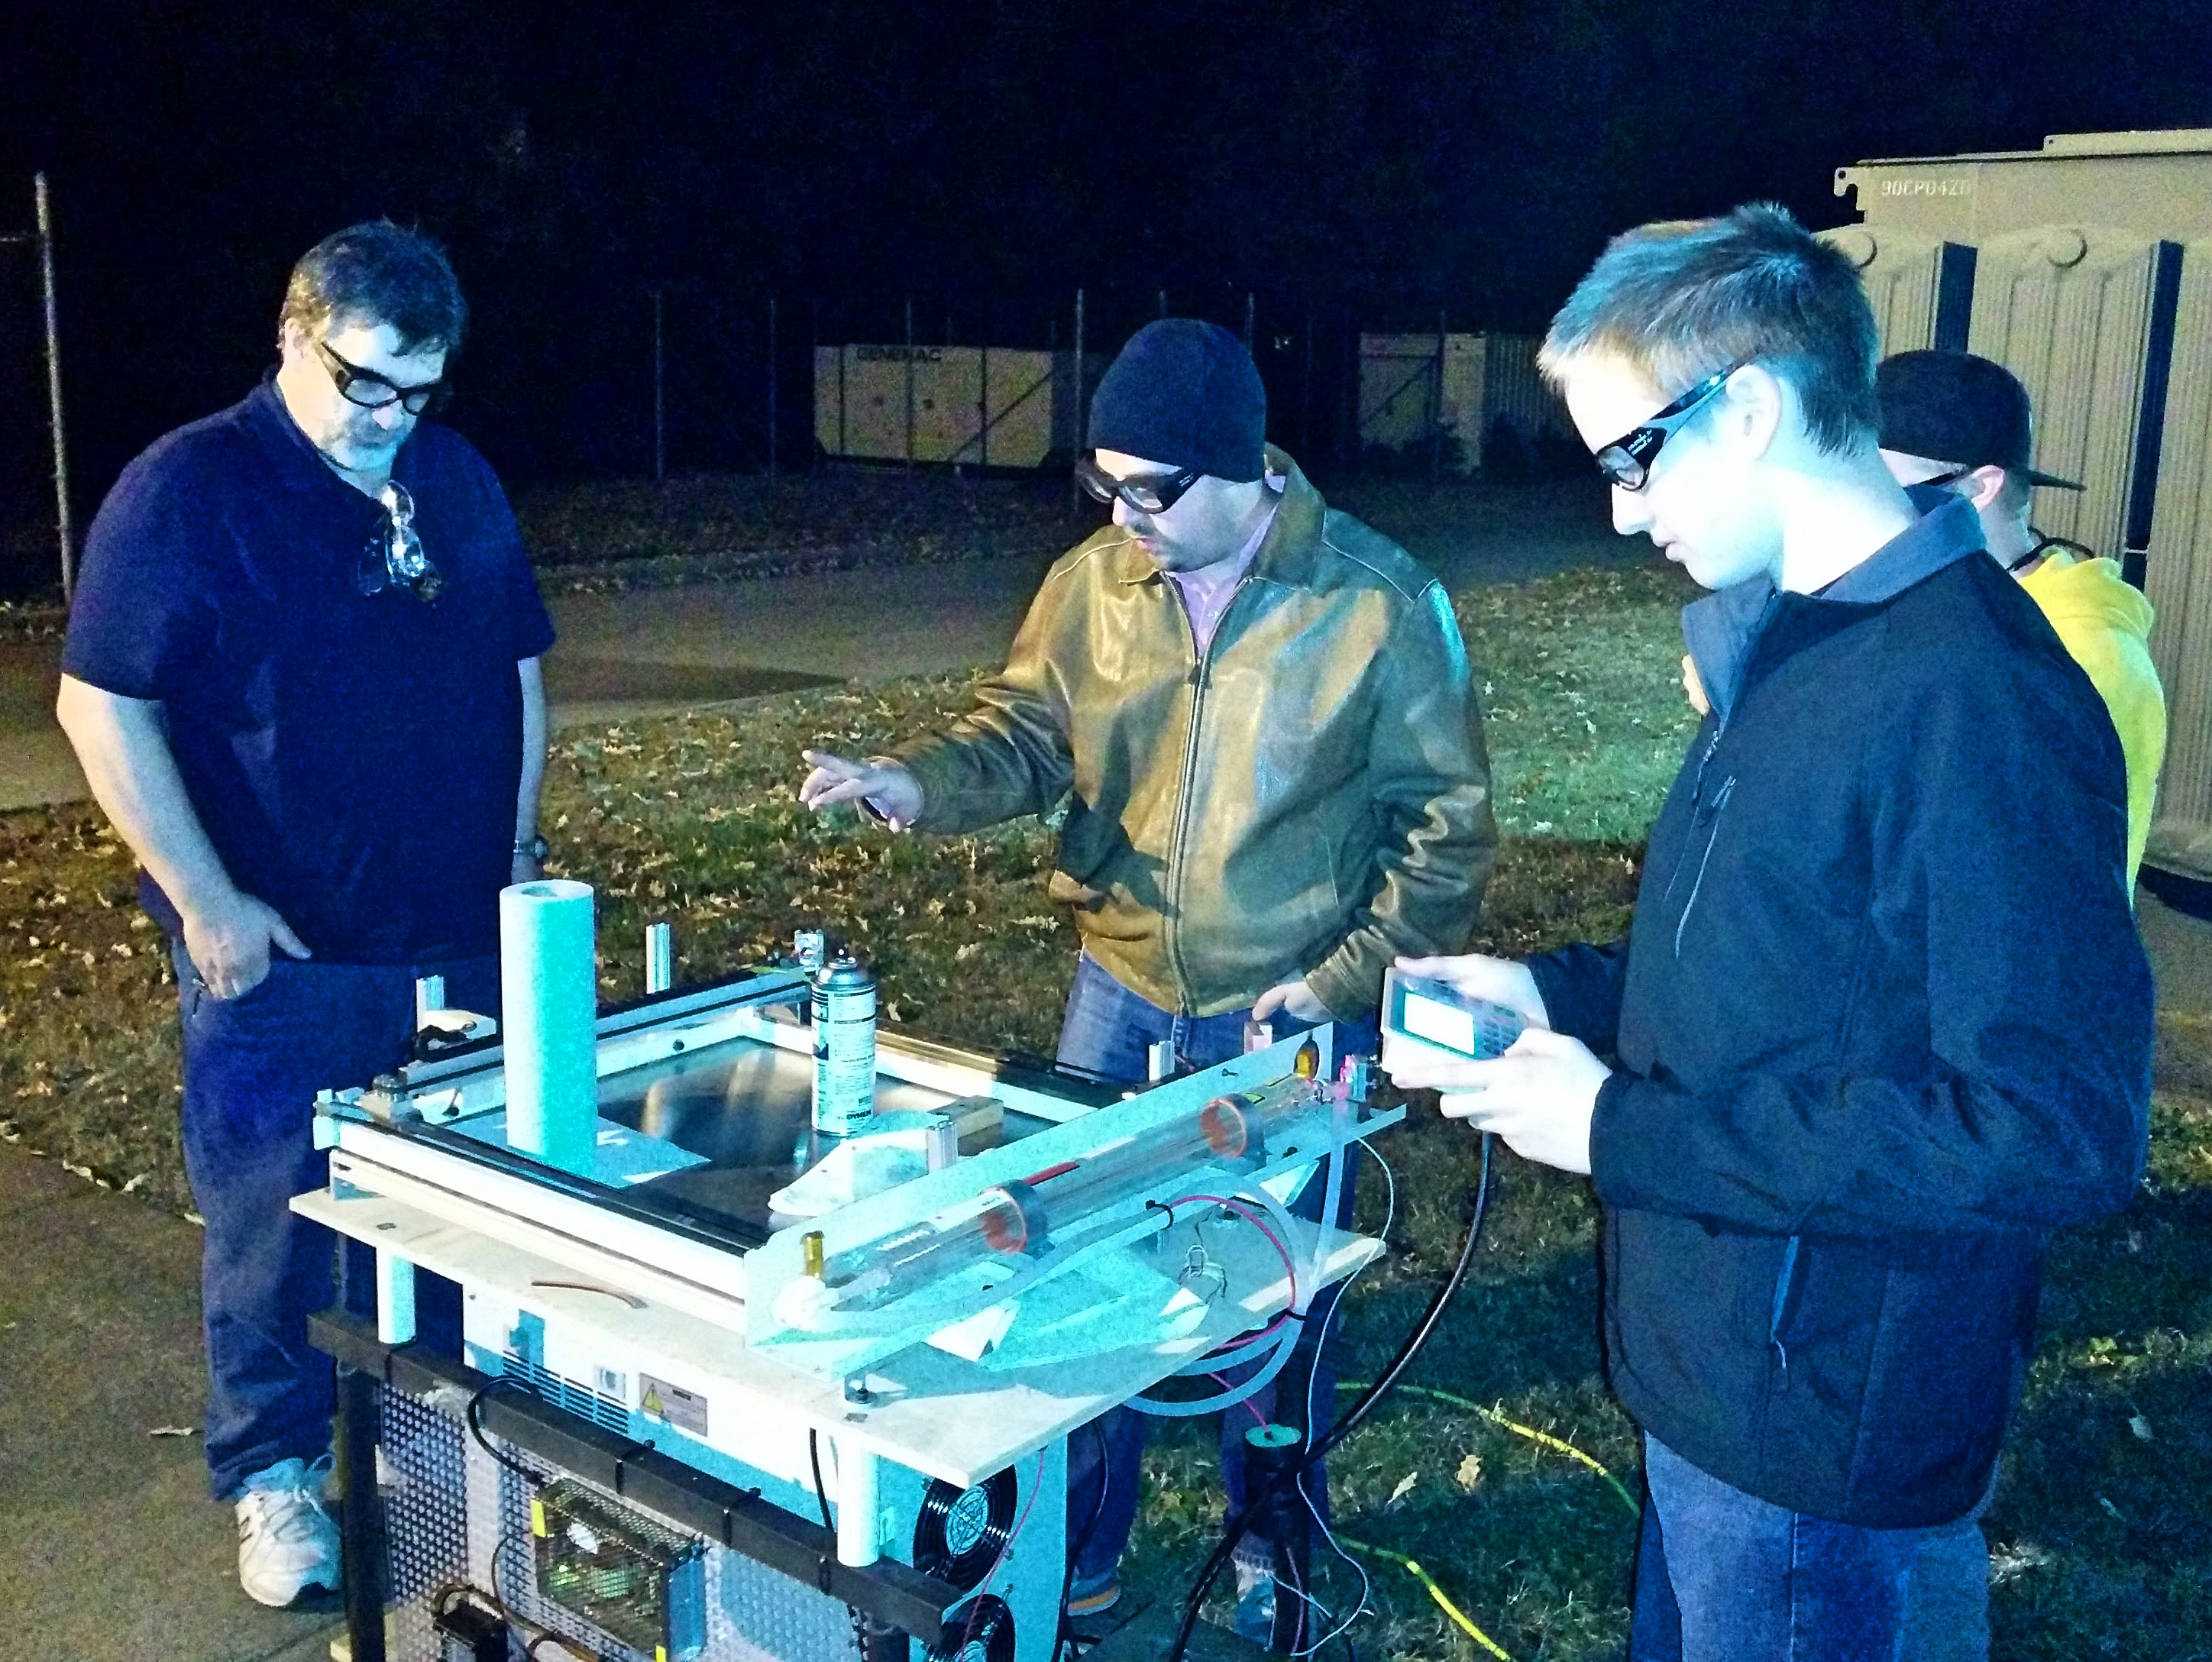
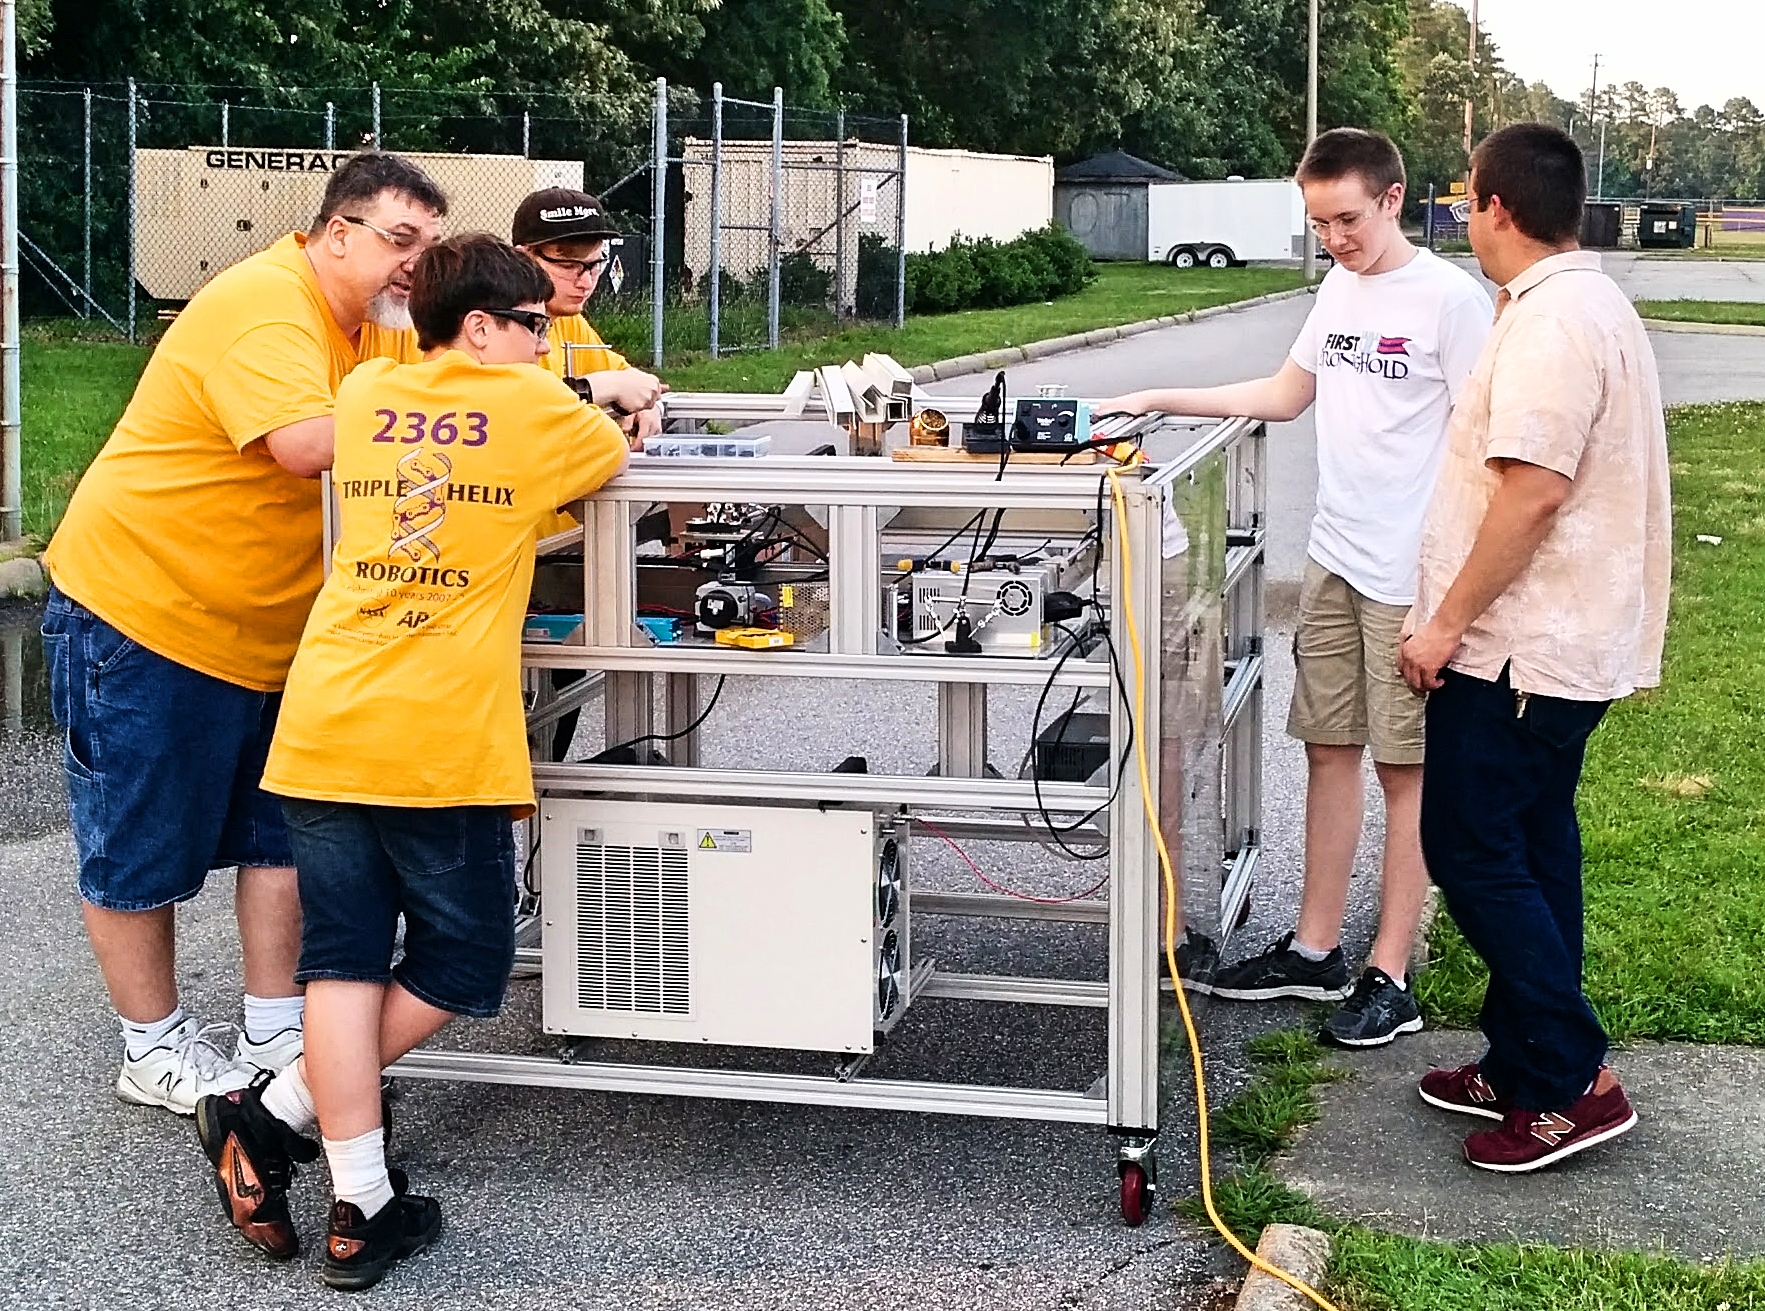
During the robotics build season, we only have 6 weeks to build the robot. We don’t have alot of time to design, prototype, and test parts for the robot. The team was offered the chance to buy a old laser cutter, missing some parts, from one of the mentor’s coworkers. We decided that it would be very helpful to use the laser cutter to make prototype parts faster, and more accurately out of wood or plastics. Once we got the old laser cutter up and running with old parts, we purchased brand new parts to build a new laser cutter from scratch, which is double the power, and double the size. Below we are testing the old laser cutter that we fixed, and further down is a picture of our new, more powerful laser cutter we built.
Parts for the Larger, More Powerful Laser Cutter
- Custom Aluminum 80/20 Frame
- XLE X/Y Stage Frame
- 80 Watt Laser Tube
- 80 Watt Laser Power Supply
- Water Chiller Unit
- 2 Stepper Motors and Drivers with Encoders
- 2 48 Volt Power Supplies
- LightObject X7 Laser Controller
- 24 Volt Power Supply
- Custom Power Distribution Panel
- Air Pump
Details
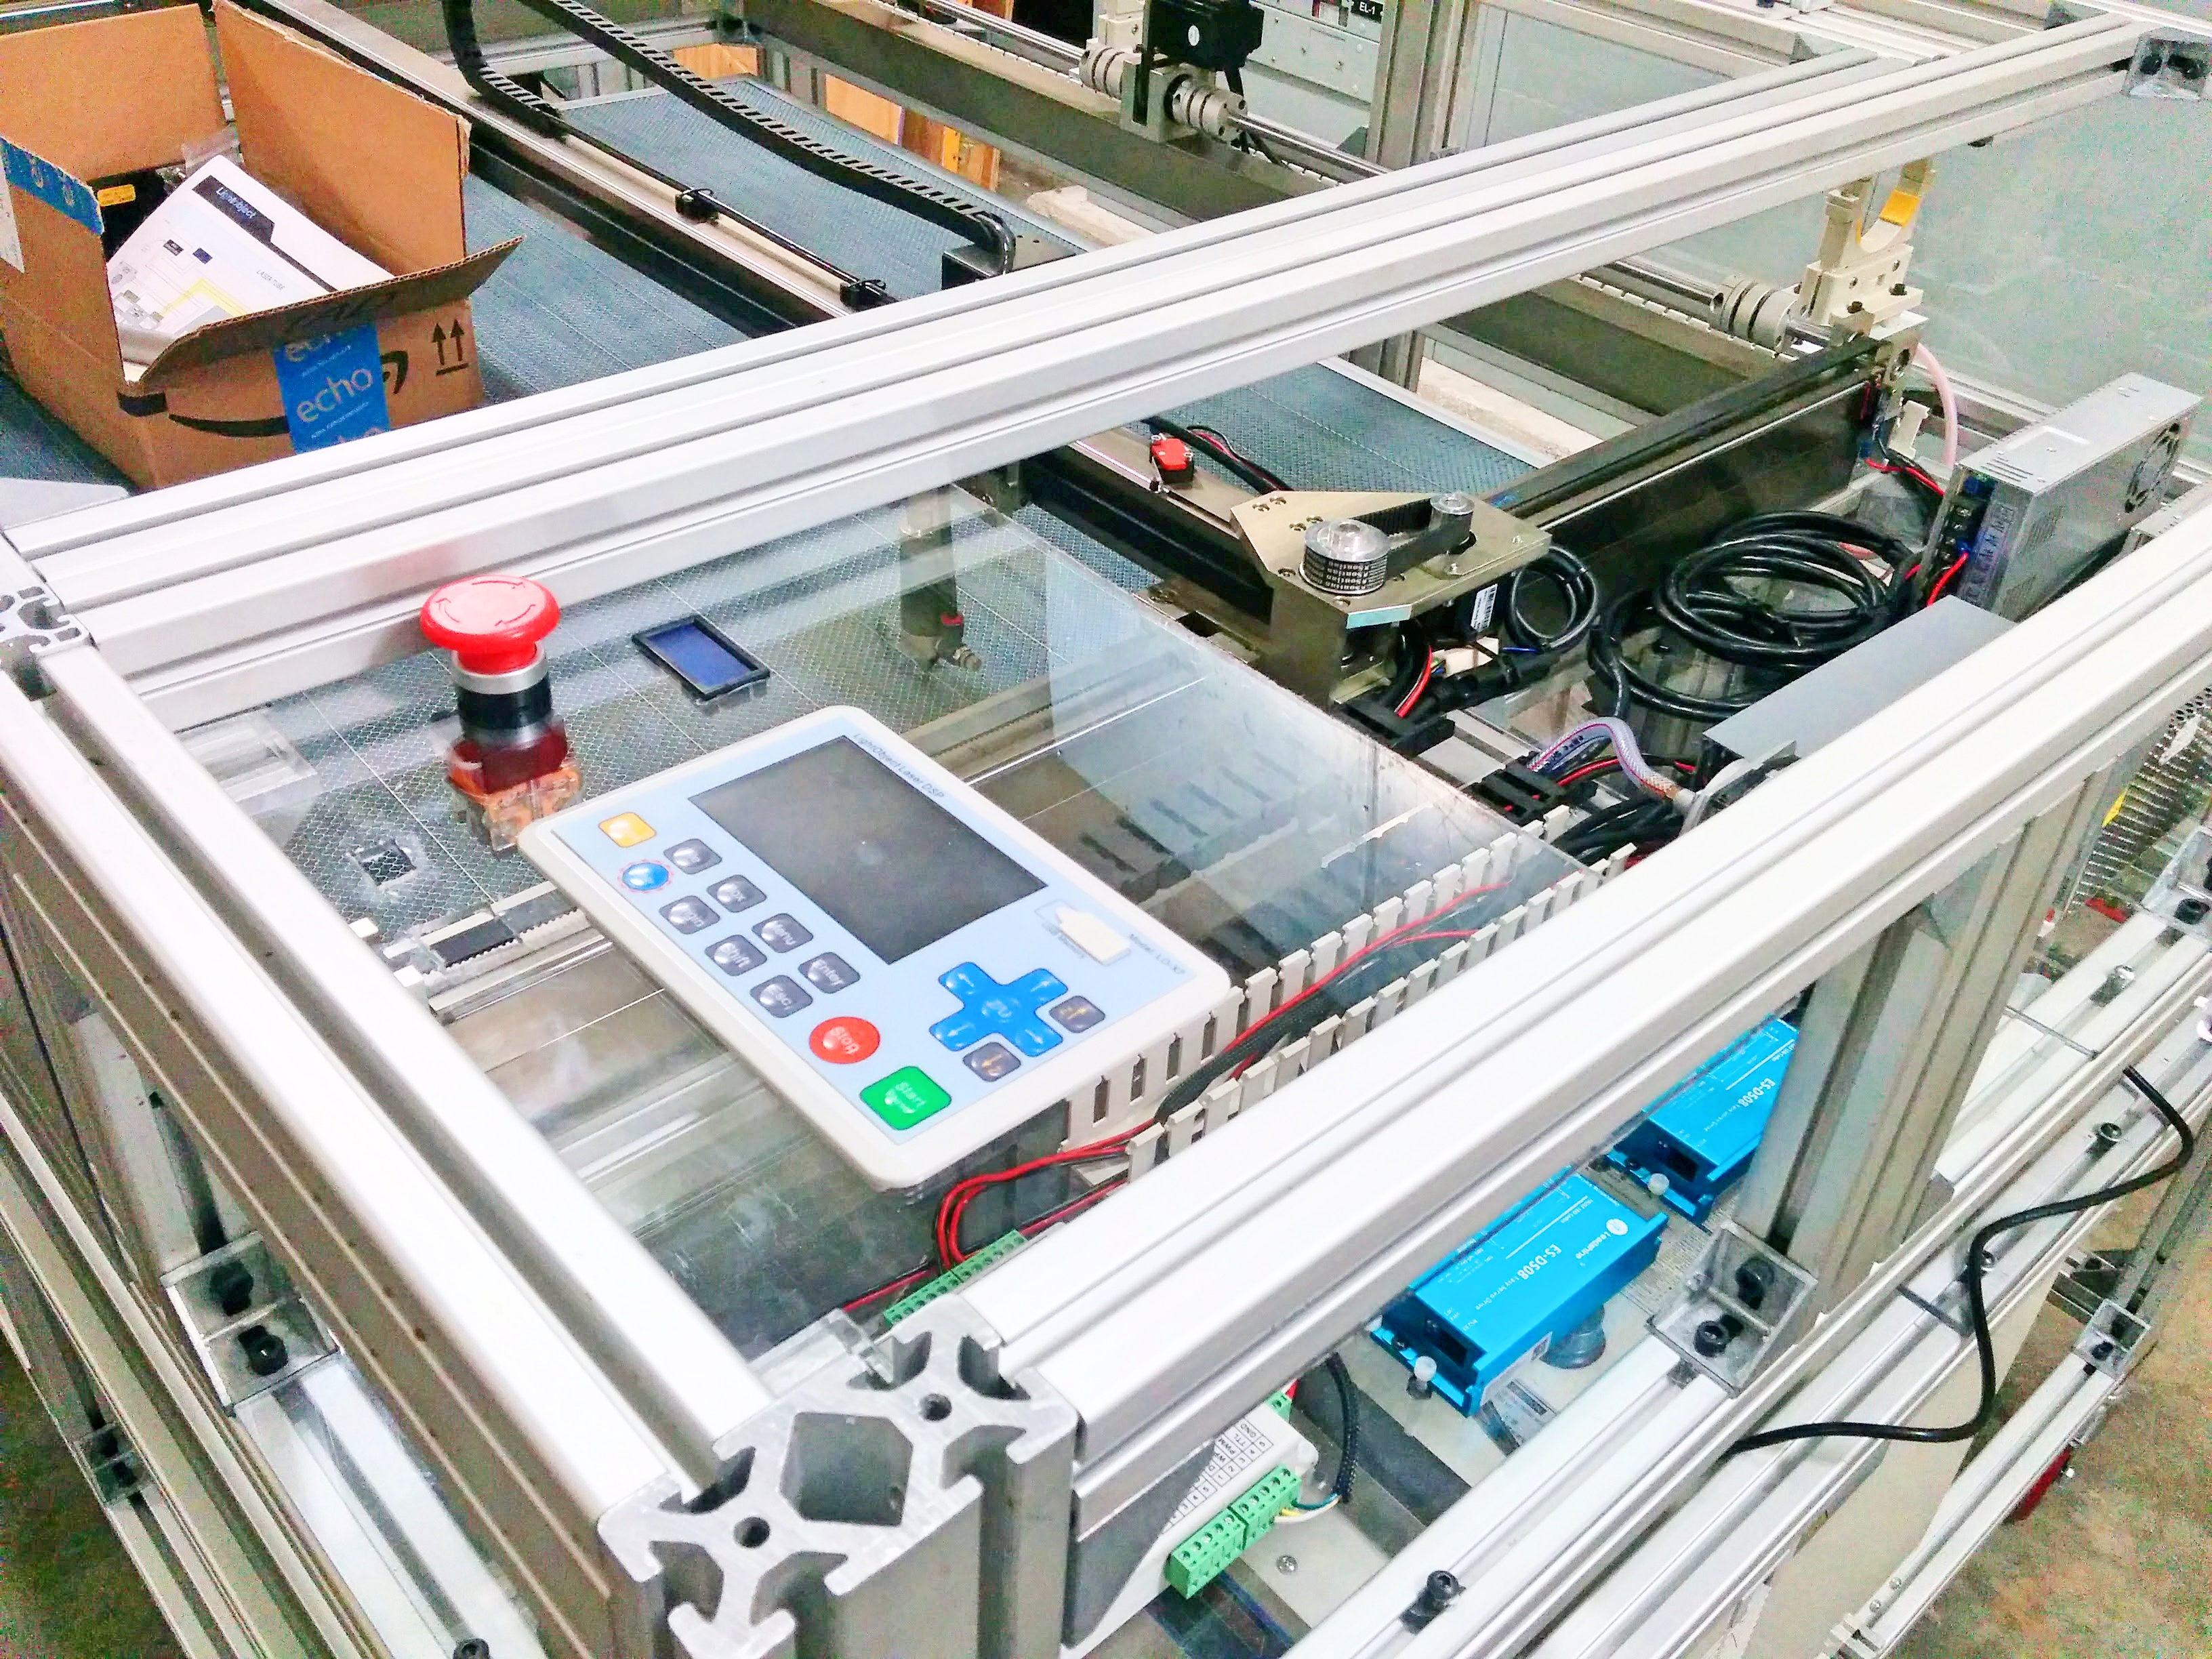
For the new larger, more powerful laser cutter, we started by building a large aluminum frame from 80/20 that can accommodate the 4 foot long laser tube and a larger cutting space. We, then, assembled the x and y frame from a kit, and upgraded to stepper motors with built in sensors for closed loop control. We mounted all the electronics and made a custom control panel with the screen, USB port, current meter, emergency stop, and laser tube current meter. In order to power the air pump, water chiller, and 4 power supplies, I designed and built a custom power distribution board to get wall outlet voltage from the power entry module with a circuit breaker to the un-switched and emergency switched circuits. This way when the emergency stop is activated, the motor movement is disabled and the laser is disabled, but the control system, air pump, and water chiller stay on. We, then, used the laser to cut and engrave many different types of materials, and recorded the power level and the speed needed to cut that material in a table for future use. We render a 2D drawing DXF file from a 3D CAD model, transfer it to the laser cutter on a USB drive and, then, load and cut the design.
Next Steps
The next steps in this project are making a spring-loaded door to access the table, so it can open and stay up while inserting or removing material and to build some kind of fume extraction system, with a fan, that can take smoke away from the workpiece and exhaust it outside the plastic enclosure of the laser cutter. Currently, we operate the laser cutter outside so fumes are not an issue.